Having two SD Card slots is great to have for a redundancy backup in case there’s and issue with the card in Slot 1.
These instructions are based on the Sony A7 III, but may apply to the other Sony Alpha cameras, with two memory card slots.
Since Slot 2, on the Alpha 7 III, has a slower write speed than Slot 1, I’ve configured the camera to write RAW in Slot 1 and JPEG to Slot 2. Writing RAW to Slot 2 may hinder burst mode as the camera will use the slower speed to write to both slots. If you rarely use burst mode try writing RAW to both slots to if that works for you.
To configure the Slots, use the following steps.
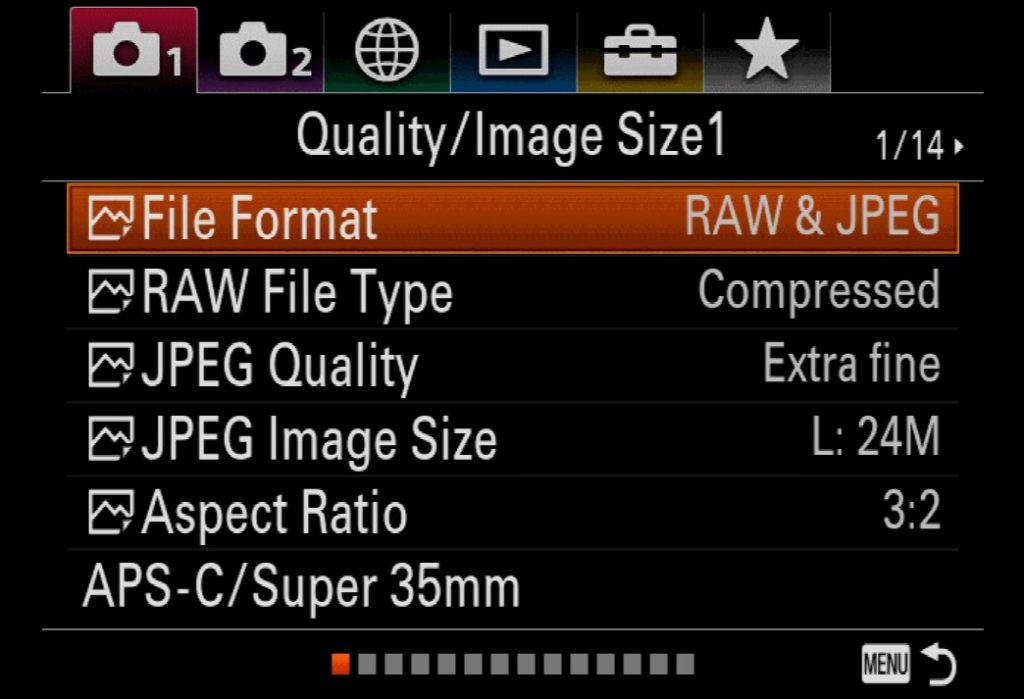
- Go to the Camera: Quality/Image Size menu (1st tab), Page 1/14
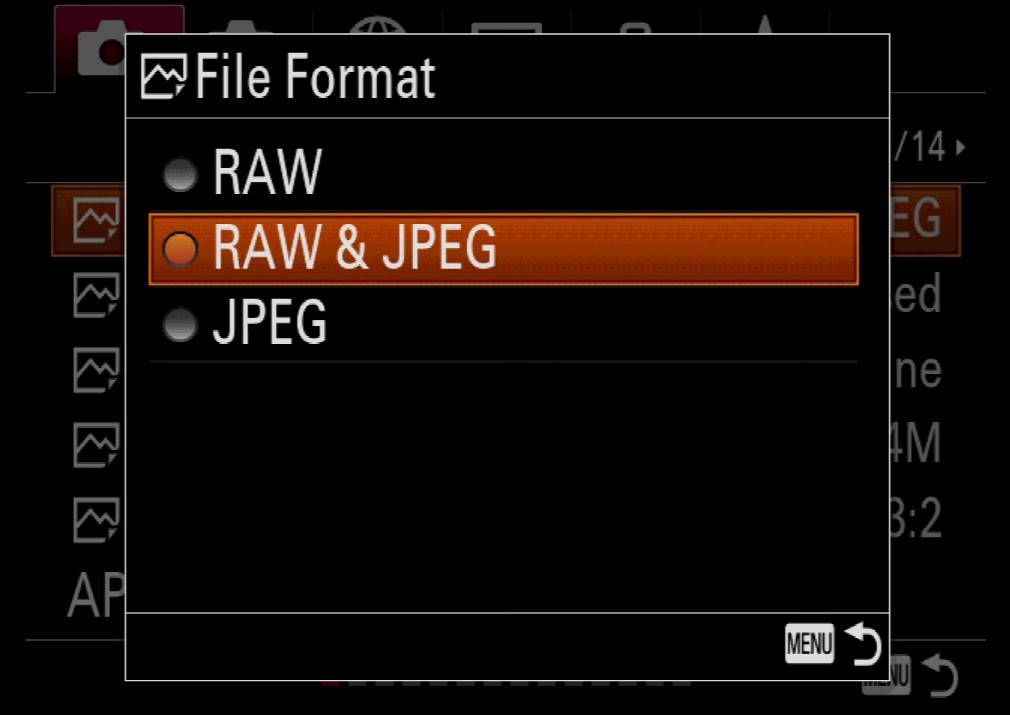
- Select “File Format” and set it to “RAW & JPEG“
- Go to the Setup Menu (Looks like a toolbox.)
- Go to Page 6/7
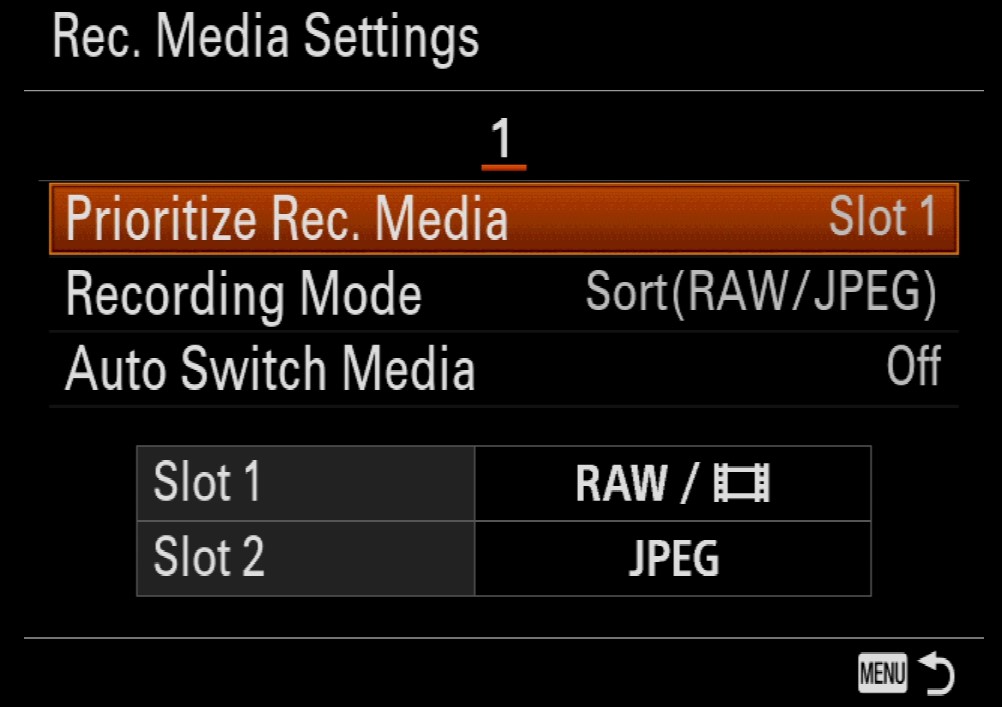
- Select Record Media Settings
- Set “Prioritize Rec. Media” to “Slot 1“
- Set “Recording Mode” to “Sort(RAW/JPEG)“
Below “Auto Switch Media,” you should now see:
- Slot 1: RAW/Video
- Slot 2: JPEG
Recording Mode Choices
| Sort (RAW/JPEG) | Writes RAW to Slot 1 and JPEG to Slot 2 | Video in Slot 1 only |
| Simult. (P/V) | Writes RAW, JPEG, and video, to both Slot 1 and Slot 2. | . |
If you have a Sony E-mount camera with two SD card slots and the new menu system, introduced with the Sony A7S III, here are the settings to record to both cards simultaneously.
MENU > Shooting > Media > Rec. Media Settings > Recording Media > Simult. Recording
Also turn off “Auto Switch Media”. This setting won’t help if you’re writing to both cards. If the camera reports one card is full, and you’re using the same capacity cards in both slots, then the other card will be full also.
Notes
- Import the RAW images, and exclude the JPEG unless you absolutely need them. You’ll be wasting space by importing the JPEG. If you do need JPEG, just export the RAW to JPEG.
- Photos on the SD Card are located in : DCIM \ 100MSDCF
- Videos on the SD Card are located in: PRIVATE \ M4ROOT \ CLIP
SD Memory Cards
The Sony A7 III has two SD Memory Cards slots that are different speeds. To get the best performance for RAW photos and 4K video in Slot 1, it’s recommended to use a Class 10 U3 300MB/s UHS-II Memory Card.
For example
- SanDisk SDSDXPK-064G-ANCIN Sandisk Extreme Pro – Flash memory Card – 64 GB – SDXC UHS-II
- Sony SF-G64/T1 High Performance 64GB SDXC UHS-II Class 10 U3 Memory Card Read Speeds up to 300MB/s
For Slot 2, you can use UHS-I memory cards, rated at 95 MB/s.
Reference
- Sony A7III Dual Card Setup Guide by Alpha Shooters
- The Sony Alpha Camera page has lots more configuration information and tips.