The focus of this page is to share references, configurations, and tips for the Sony Alpha 7 IV and the Sony Alpha 7 III, and may also apply to other Sony Alpha cameras, like the a7R IV, α7R IV, α7S III, a7S III, a9 III, α1, a1, Alpha 1, a7 RV (a7 R5), a7 V, a7 RVI (a7 R6)
Contents
- 1 News, Discussion
- 2 Tips / Fixes / Solutions
- 3 Where are Photos and Videos Saved on Sony Alpha Cameras?
- 4 Sony Technology
- 5 Sony Alpha 7 IV
- 6 Sony Alpha 7 III
- 7 Eye Auto Focus (Eye AF), Real Time Eye AF
- 8 Manual Focus
- 9 Metering Modes
- 10 Exposure
- 11 ISO and Dynamic Range
- 12 Silent Shooting Mode
- 13 Setup Guides
- 14 Setup Guides for Video
- 15 Tips
- 16 Tethered Capture with Sony Cameras
- 17 User Experiences
News, Discussion
- Forums
- r/SonyAlpha: Reddit’s most popular camera brand-specific subreddit!
- Sony Alpha Search – Search r/sonyalpha using the pushshift.io API
- r/sonya7iv
- Fred Miranda Sony Forum
- r/SonyAlpha: Reddit’s most popular camera brand-specific subreddit!
- Sony Alpha Universe is a website that showcases the latest news, stories and tips for Sony camera users.
- Sony Firmware Updates for Cameras and Lenses
- SonyAlphaRumors.com – Find out the latest rumors, reviews, and deals on Sony Alpha cameras and lenses from various sources.
- Associated Press (AP) partners with Sony
Tips / Fixes / Solutions
- Memory Cards and recommendations
- How to fix lens communication error on Sony cameras
- Power Save Start Time function does not work and the camera remains on even though the set time has elapsed
- Instead of turning off remote/network functions, just turn on Airplane Mode.
- Does the camera continuously adjust the focus while in Continuous Shooting or Speed Priority Continuous focus mode?
- The image sensor is tilted when the camera is turned off – Article ID : 00253666
- Sony Warranty Checker – Calculates warranty based on the day of purchase. If you have registered your product through MySony with the correct purchase date or if you had service on your product with Sony before, the product will be recognized and will give an accurate warranty end date.
Where are Photos and Videos Saved on Sony Alpha Cameras?
- Photos are saved in: DCIM > 100MSDCF
- Videos are saved in: PRIVATE > M4ROOT > CLIP
- Sony A7 IV – How-To Transfer Photos and Videos to Computer (also on YouTube)
Sony Technology
- XAVC is the new standard for image quality and flexibility. XAVC offers reduced bit-rates and file sizes without sacrificing on-screen quality.
- Limitations on recording 14 bit images in RAW format on Sony cameras. Article ID : 00231289
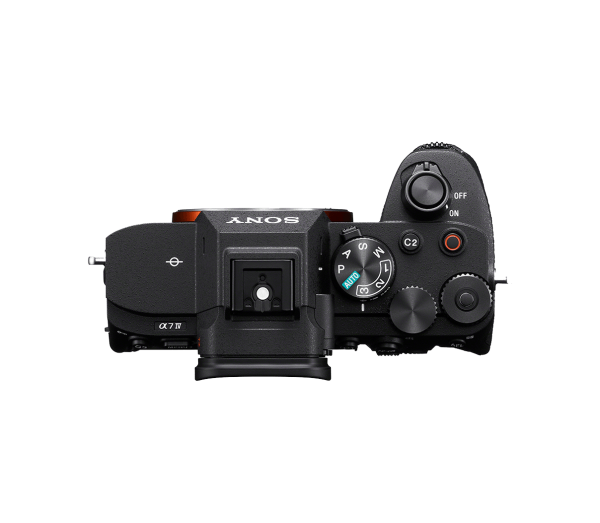
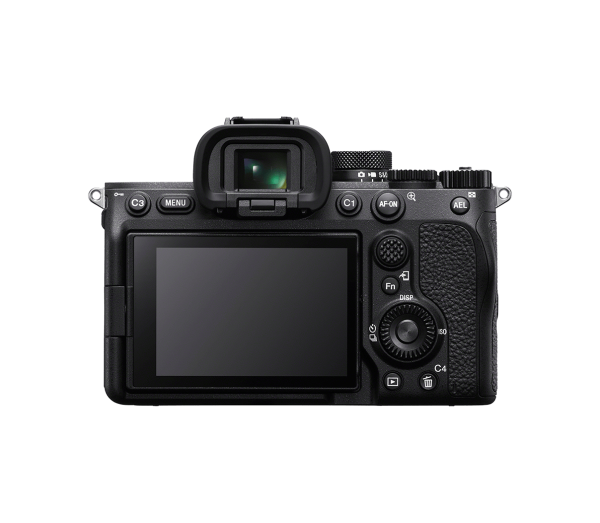
Sony Alpha 7 IV
Sony Alpha 7 IV, Model No: ILCE7M4, a.k.a. a7 IV, α7 IV, a7M4

Sony Alpha 7 IV: Specifications
Sensor
- Sensor Type: 35mm Full Frame (35.9 x 23.9mm) Exmor R CMOS
- Maximum Resolution: 7008 x 4672 pixels / 33 Megapixels (MP)
- Aspect Ratio: 3:2
File Size
- File size (Uncompressed RAW) ≈ 65 MB
- File size (Lossless RAW [L – Full Size RAW] ) ≈ 39 MB
Burst FPS ( [Continuous Shooting: Hi+ ]) w/Mechanical Shutter
- 6 fps (Uncompressed RAW & Lossless Compressed RAW)
- RAW images have a resolution of 14 bits per pixel.
- Source: Sony A7 IV – Max FPS by File Type by Timothy Mayo
- “If you check the footnotes of the specs page on Sony’s UK site you’ll find the following statement:”
- “Maximum continuous shooting speed is 6 fps when shooting uncompressed RAW / uncompressed RAW+JPEG images.”
- “If you check the footnotes of the specs page on Sony’s UK site you’ll find the following statement:”
- Up to 10 fps (Compressed RAW & JPEG)
- Resolution is limited to 12 bits in the following shooting modes: [Cont. Shooting] when [RAW File Type] is set to [Compressed]
Focusing
- Eye Autofocus with Real-time Tracking (RTT)
- Tracking is sticky once the AF locks. The camera follows the selected subject as it moves outside the confines of the initial focus area box.
- Configuration
- Focus Area > Tracking Expanded Spot
- Touch Tracking
- Setup > Touch Operation > Touch Func. in Shooting = Touch Tracking
Memory card slots: (See: Recommendations)
- Slot 1: SD (UHS-II) or CF-express Type A
- Slot 2: SD (UHS-II)
- Still images: ISO 100 to 51,200
- Video: ISO 100 to 51,200
Dynamic Range: 15 Stops
4K Video
- 10-Bit 4.2.2 Internal Video
- 4K 60p with a 1.5x crop.
- For wide angle at 4K 60p, the Sony E 10-18mm lens, or Tamron 11-20mm, gives you a full frame equivalent of 15-27mm.
- Focus Breathing Compensation, exclusively for Sony’s E-mount lenses.
Recording Limit
- No recording limit for video.
Sony Alpha 7 IV: Firmware Updates
To check the version: Menu → Setup → Setup Option → Version
Make sure the data/time on the camera are current.
To update the a7 IV (ILCE-7M4) Firmware (System Software), you must…
- Make sure the memory card is empty and was formatted in-camera.
- Double-check the file size of the downloaded firmware file is correct before attempting to update the camera. If the filesize is off, you may brick the camera. Failure to confirm the file size is where some people have had issues with updating.
- Copy the firmware file, BODYDATA.DAT, to the root/top of a memory card.
- Insert the memory card into Slot 1 of the camera. Make sure Slot 2 is empty.
- Perform the update. Be patient. The update take about 5 minutes.
If the firmware update fails to install, download the firmware file again and use a different memory card, which was formatted in-camera, then try the update again.
Sony Alpha 7 IV: Reference & Reviews
- Sony α7 IV (ILCE-7M4) Help Guide (Full online manual)
- List of icons on the monitor
- Touch function icons (Available as of firmware v6.00)
- Memory cards that can be used. Also see: Memory Cards and recommendations
- Format SD Cards
- MENU →
 (Shooting) → [Media] → [Format] → desired memory card slot.
- MENU →
- Display Media Info
- MENU → (Shooting) → [Media] → [
 Display Media Info.] → desired memory card slot.
- MENU →
- Search: Sony a7 IV
- Sony A7 IV Sensor test by DXOMARK
- Sony A7 IV – Max FPS by File Type
- Sony A7 IV – Do You Really Need a CFexpress Card?
Reviews
- Sony A7IV Review 3 years late by Chris Turner Photographer
- Sony a7IV (ILCE-7M4) Definitive Review | DA by Dustin Abbott – (ISO Performance)
- Sony a7IV Review: Is It Worth The Upgrade? by ShotKit.com
- Sony Alpha 7 IV Full-frame Mirrorless Interchangeable Lens Camera (ILCE7M4 B)
- Sony A7 IV 6 Months Later | Only 1 Major Flaw by Brandon Washington
- Skip to 9:16 if you already know the general info on this camera
- How does the A7IV stack up against the competition? by Dave McKeegan
- Sony A7IV Camera Review by Mark Galer
Maintenance: Parts & Repairs
Sony Alpha 7 IV: Settings / Configuration
Enable all the options for Different Settings for photo and video
- Setup > Operation Customize > Different Set for Still/Mv
Prevent the shutter from triggering if there’s no memory card in the camera
- Shooting > Shutter/Silent: Release w/o Card = Disable
Prevent the shutter from triggering if focus wasn’t achieved
- Focus > AF/MF: Priority Set in AF-C = AF
Prevent the shutter release when a lens isn’t mounted.
- Shooting > Shutter/Silent: Release w/o Lens = Disable
Write the Camera’s Serial Number to EXIF metadata of each photo
- Shooting > File > Write Serial Number = On
- To see the serial number in Adobe Lightroom Classic, go to Metadata > Customize… tick Serial Number.
- Shooting > Shooting Display > Live View Display Set > Live View Display
- On = What You See, Is What You Get.
- Off = When using flash, will lighten up the view finder so you can see in low light.
- MENU →
 (Setup) → [Operation Customize] → [
 Custom Key/Dial Set.] → assign the [Bright Monitoring] function to the desired key.
- During [Bright Monitoring], [Live View Display] will automatically switch to [Setting Effect OFF], and setting values such as exposure compensation will not be reflected in the live view display. It is recommended that you use [Bright Monitoring] only in dark locations.
- The only way to use [Bright Monitoring] is to assign it to a custom button.
- Shooting > Image Quality > Lens Compensation > Breathing Comp.
- * Only compatible with some Sony lenses
Dynamic Range (D-Range) Optimizer
- Exposure/Color > Color/Tone > D-Range Optimizer = Off
- When quality is set to “RAW” or “RAW+JPEG”, then D-Range must be Off so the JPEG preview on the LCD and viewfinder will match the RAW exposure.
- The D-Range Optimizer function cannot be used in the following conditions:
- When the exposure mode is “M mode” or when the quality is set to “RAW” or “RAW+JPEG”
- When the metering method is “Spot metering” or “Center-weighted metering”
- Tracking: Spot L
- Touch Tracking (Starting tracking with touch operations)
- MENU → (Setup) → [Touch Operation] → [Touch Func. in Shooting] → [Touch Tracking]
- To cancel tracking, touch
 (Tracking release) icon or press the center of the control wheel.
- To cancel tracking, touch
- MENU →
Adjust Focus Area settings to the camera’s orientation (horizontal/vertical) (Switch V/H AF Area)
- MENU →
 (Focus) → [Focus Area] → [Switch V/H AF Area] → AF Point + AF Area.
Shutter When Powered Off / Anti-Dust Function
- Do NOT enable the Shutter When Pwr OFF function!
- It’s off by default.
- You risk damaging the shutter because the shutter is way more fragile than the glass covered sensor.
- Cleaning the sensor is safer, easier and less expensive than repairing or replacing a shutter.
- If the shutter does block dust from getting on the sensor, unless you actually clean the shutter, that dust still remains INSIDE the camera body. So, each time you release the shutter, that dust is moved around inside the body, and is likely to end up on your sensor anyway or someplace else that might actually damage the camera.
- Setup > Setup Option > Anti-dust Function > Shutter When Pwr OFF = Off
Menu > Setup > Operation Customize > Custom Key/Dial Set.
| Menu Item / Button | Is Set to | Notes |
| AEL (Auto Exposure Lock) | AEL Hold | |
| AF-On | AF/MF: AF On | |
| Control Wheel | ||
| Custom Button 1 (Photo) | Shot. Result Preview | |
| Custom Button 1 (Video) | Audio Record Level | |
| Custom Button 2 | Focus Area | |
| Custom Button 3 | Silent Mode On/Off | C3 is less likely to be pressed by accident. |
| Custom Button 4 | Touch Operation On/Off | |
| Multi-Slc Center Button (Joystick) | Focus Standard | |
| Front Dial | Aperture | |
| Rear Dial (Left) | Shutter Speed | |
| Rear Dial (Right) | ISO |
Save/Load Settings to Memory Card
- Setup > Reset/Save Settings > Save/Load Settings
- On the memory card, the DAT file is in Private > Sony > Setting > 7M4 > Camset
- Important: When loading the settings file, the camera model and firmware version must be the same as the camera used to save the settings file.
- How to save and export your camera settings on the Sony A7IV by Desiree Rodriguez
Focus Modes & Autofocus
- Sony A7 IV Autofocus Guide and Test. All autofocus settings for the Sony A7 IV explained by Tymek Stolarz
- Sony Alpha Menus A to Z: Focus Area by Mark Galer
- Sony A7IV Autofocus – Settings/Modes Explained by Sohil Pandya
- Sony A7IV EyeAF problems Q&A written by Catalin Marin, one of the admins of the Sony A7IV eyeAF issues Facebook group.
- Search: Real-time Tracking and Real-time Eye AF Tracking
Improve Autofocus in Low light
- Focus > AF/MF > Aperture Drive in AF: Set to “Focus Priority”
- When using smaller apertures (larger numbers), e.g. f/8, Aperture Drive in AF, temporarily opens the aperture to allow the camera to focus better in very low light.
- How to make your Sony A7IV autofocus even better – Aperture Drive (A1, A7RIV, A9II)
- Note: A Purple focus area means the camera can’t lock focus. This is caused by the light being too low or the area you’re focusing on has too low contrast.
Preventing Overheating
While shooting 4K video, the camera may overheat and shutdown. There are some things you can do to increase the time before the camera shuts down.
- Change the automatic temperature overheating shutoff:
- MENU → (Setup) → [Power Setting Option] → [Auto Power OFF Temp.] → “High”
- MENU →
- Pull the LCD panel away from the body.
- The battery is a source of heat. Leaving the battery door open my help the heat escape the camera.
- Do not leave your camera unprotected from direct sunlight or in a hot car.
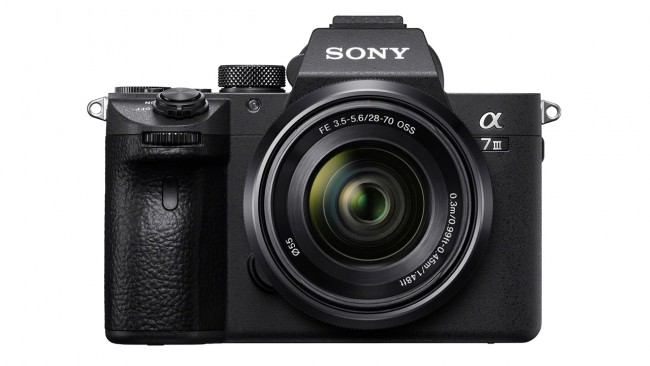
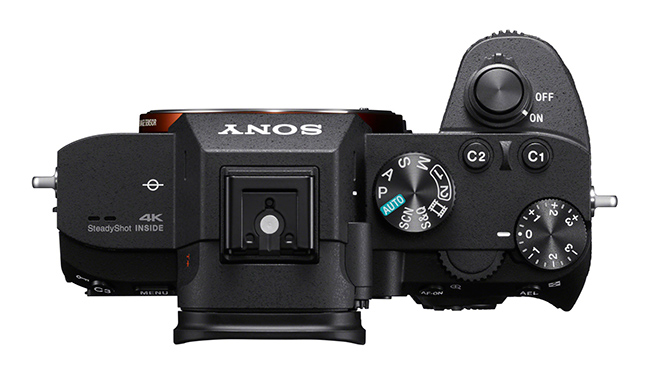
Sony Alpha 7 III
Sony Alpha 7 III, Model No: ILCE-7M3, a.k.a. a7 III, α7 III, a7M3
Specifications
- Sensor
- Sensor Type: 35mm Full-Frame (35.9 x 23.9mm) CMOS Sensor
- Maximum Resolution: 6000 x 4000 pixels / 24 Megapixels (MP)
- Aspect Ratio: 3:2
- File Size
- File size (Uncompressed RAW) ≈ 47 MB
- Burst FPS: 10 fps (Uncompressed RAW, JPEG)
- Focusing: Eye Autofocus
- 2 Memory card slots:
- Slot 1: SD (UHS-II)
- Slot 2: SD (UHS-I)
- Dynamic Range: 15 Stops
- In-body stabilization up to 5 stops compensation
- 4K video:
- 30 minute recording limit for video.
Reference
- Sony ILCE-7M3 Help Guide
- List of icons on the monitor
- Memory cards that can be used
- Format SD Cards
- MENU →
 (Setup) → [Format] → desired memory card slot.
- MENU →
- Display Media Info.
- MENU → (Setup) → [Display Media Info.] → desired memory card slot.
- MENU →
- Search: Sony a7 III
- Sony A7 III – Beginners Guide, How-To Use the Camera by Jason Hermann
- Sony a7 III User’s Guide by Jared Polin
- Sony A7 III: Low-light performer by DxOMark.com
- Sony a7 III vs. Canon EOS R vs. Nikon Z6 Specs Comparison by Sony Rumors
- Sony A7iii Review for Filmmakers || Sony A7 iii VS Canon 1DX Mark ii by Green Light Life
- Sony A7III Review: Should You Buy The Sony A7III in 2024?! by Sightseeing Stan
- Forums
Firmware Updates
Make sure you update to the latest firmware on your cameras, lenses, and other hardware.
To view the firmware version, go Menu (Setup7) > Page 7/7 > Version
- Sony α7 III (ILCE-7M3 / ILCE-7M3K)
- Firmware v4.04, released 2026-04-15
- Bulletproof Guide to Sony Camera Firmware Updates by Brian Smith
- Warning: Do not disable security software! Brian Smith’s guide is good. But, a part of step 5, “disabling security software,” is very questionable, and not recommended, especially if one is still connected to the Internet, as your computer may be vulnerable during the time the security software is disabled.
- SONY camera FIRMWARE – ULTIMATE SOLUTION for MAC 2021
- For the Firmware update to work on MacOS you may need the Sony Camera Driver for Mac
Eye Auto Focus (Eye AF), Real Time Eye AF
Important:
- The person’s eye must be within the Focus Area rectangle for the camera to register/track/detect the eye.
- Make sure you’re using the latest Firmware for the best Eye AF and Tracking functionality and performance.
How to use “Eye AF” (Eye Auto Focus) on the Sony a7 III
- Set the “Focus Mode” to AF-C (Auto Focus – Continuous).
- Menu 1 (AF2), Page 5/14
- Also set “Priority Set in AF-C” to AF
- Set the “Focus Area” to Wide or Zone
- Menu 1 (AF1) Page 5/14
- Important: An eye must be within the Focus Area rectangle to register/be tracked.
- Note: Lock-On AF: Expanded Flexible is not compatible with Real Time Eye AF
- Tip: If you’re in a crowd, try, Flexible Spot: L, to isolate the person of interest.
- Enable “Face/Eye Priority in AF” (Real Time Eye AF)
- Menu 1 (Camera Settings 1) (AF2) Page 6/14
- Face/Eye AF Settings > Face/Eye Priority in AF = On
- Set Subject Detection = Human
- Eye AF activates with a half-press of the shutter release button.
- With Firmware lower than v3.00, Press & hold the “select button” in the center of the Control Wheel [15] to enable Eye AF.
- Alternatively, you can program Eye AF to the AF-ON or AEL button to make it easier to engage Eye AF, when using firmware prior to v3.00. (i.e. Back button focus)
How Real Time Eye AF works with Different Focus Areas
- [Wide] Real Time Eye AF will search & track an eye within the entire frame
- [Zone] Real Time Eye AF will search & track an eye within the selected Zone
- [Center] Real Time Eye AF will search & track an eye within the center of the frame. (Not recommended)
- [Flexible Spot: L,M,S] Real Time Eye AF will search & track an eye within the selected Flexible Spot. (Large works best for this setting)
- [Expand Flexible Spot] Real Time Eye AF will search & track an eye within the area or surrounding the Flexible Spot
- [Lock-on AF: Expand Flexible Spot] *Not compatible with Real Time Eye AF
Reference
- Best AUTOFOCUS Settings for Sony A7IV, A7sIII, FX3, A7III, A6600, A7c Camera by Jacques Crafford
- How Real Time Eye AF works with a7 III & a7R III FW 3.00 by Brian Smith
- Sony a7iii & a7riii firmware 3.0 Fn menu tab fix and eye af fix for flexable spot by David Oastler
- Sony a7 iii quick tip – Eye AF – What it is / How to set it up by BiscuitsAlive
- Game-Changer: Continuous Eye AF by Alpha Universe
Auto Focus Modes
- Best Sony Autofocus settings for wedding photography (Sony A7 IV)
- Choosing the Best Focus Area on your Sony Alpha Camera by Mark Galer’s Alpha Creative Skills
- To learn more about Focus when using Sony Alpha cameras there is an extended 90-minute video available: Sony Alpha Focus Masterclass
- Sony A7 III Autofocus Settings – A Complete Guide to the AF menu settings by PhotoGearNews
- Sony a7iii focus modes explained by David Oastler
- Understanding Focus Area on Sony Mirrorless Cameras by The Gary Fong Channel
- Sony Focus Modes – Get the most out of your A73, A7R3, A9, A7S2, A7R2 by Chris Turner
- Fast Low-Light AF when using Sony Alpha Cameras by Mark Galer’s Alpha Creative Skills
- Sony A7III Autofocus Modes Explained by Spyros Heniadis
- Whether to use back button AF on Sony by Adam Brown
Prioritize Focusing While Using Continuous AF and High fps
- Set: Menu: Camera Settings 1 > Page, AF1: 5/14 > [Priority Set in AF-C] = AF
- AF: Prioritizes focusing. The shutter will not release until the subject is in focus.
- This allows the camera to reduce the # of frames/second, if it must, to make sure the focus is correct.
Manual Focus
DMF (Direct Manual Focus) with Focus Peaking
Metering Modes
- Sony Alpha Light Metering Modes by Mark Galer’s Alpha Creative Skills
- Expose for the highlights, then process for the shadows in post.
- This Is How To Get Perfect Exposure In Camera by Gary Hart
- One of the great advances of mirrorless technology brings is the ability to see the histogram before you actually shoot the photo.
Exposure
You can enable Zebras to show overexposed highlights
- In digital photography, exposing to the right (ETTR) is the technique of adjusting the exposure of an image as high as possible at base ISO (without causing unwanted saturation) to collect the maximum amount of light and thus get the optimum performance out of the digital image sensor.
- Exposing to the Right Explained by Spencer Cox
- Zebra 109+ for Sony Raw Photographers by Mark Galer
- Using Zebra for Photography Sony a7 III by Aron J Anderson
- Sony A7III Best Low Light Settings by Spyros Heniadis
ISO and Dynamic Range
- ISO on Sony cameras is often INCREDIBLY misunderstood by Dan Fox
- Photographic Dynamic Range versus ISO Setting – PhotonsToPhotos.net
- On the Sony a7 III, skip ISO 500 and go to ISO 640. ISO 640 has about the same dynamic range as ISO 400, and both are better than ISO 500.
- Read Noise in DNs versus ISO Setting – PhotonsToPhotos.net
Silent Shooting Mode
Consider assigning Silent Shooting to a Custom button to easily toggle silent mode on/off. Make sure it’s a Custom button you rarely press by accident. Don’t ask me how I know. 😉
Restrictions when using the Silent Shooting feature:
- Silent Shooting can only be selected when the mode dial is set to P(rogram), A(perture priority), S(hutter priority), and M(anual) modes.
- The camera won’t trigger the flash while in Silent Shooting mode. When you turn off Silent Shooting, you may have to cycle the power on the camera to get the flash working again.
When the Silent Shooting feature is enabled, the following functions are not available:
- e-Front Curtain Shutter
- Auto HDR
- Picture Effect
- Picture Profile
- Long Exposure NR
- BULB shooting
- If the RAW file type is set to uncompressed, and you’re making RAW or RAW+JPEG photos, you won’t be able to use bracketing.
Setup Guides
- How to Record RAW in Slot 1 and JPEG in Slot 2 on Sony Alpha Cameras
- Sony A7III-A7RIII Custom-Settings and Support eBook by Mark Galer
- This is a 200-page eBook in PDF format for the A7III and A7RIII cameras. This eBook offers you learning support in setting up your ‘series three’/MKIII full-frame camera. The eBook contains dozens of links to educational movies and articles that will help you master your camera and also the craft of taking creative and technically excellent photographs.
- Sony Help Guide for Interchangeable Lens Digital Camera ILCE-7M3 α7III (Sony.net)
- Recommended Sony A7 III Settings (PhotographyLife.com)
- Sony a7R III Training Tutorial by Tony & Chelsea Northrup
- 1-hour video user guide, with time code index, for the Sony a7R III (http://sdp.io/a7r3). (Applies to the other Sony Alpha 7x’s)
- The Sony A7 III review that shows you everything (in 4K) by Maarten Heilbron
- How to Set Up Your Sony A7iii, & Other Sony Mirrorless Cameras- Menu, Function, Custom Buttons by Jason Lanier
- Sony a7III – How I Setup for Photos & Videos | Setup Guide and Menu Settings by Jason Vong
- Camera Settings for Shooting Portraits – Sony Alpha a7lll, A7RIII and A9 by Mark Galer’s Alpha Creative Skills
- How to Set Up and Configure your new Sony a7III by Paul Gero
- Camera Settings for Shooting Action – Sony Alpha A7RIII and A7III by Mark Galer’s Alpha Creative Skills
- Guide to Sony a7 III Camera Menu Settings Hacks by Brian Smith
Custom Key Configuration
The following are the Sony a7 III Custom Button/Key Assignments I use for faster access to change or toggle settings.
- Custom Key 1 = Silent Shooting on/off selection.
- I’ve been making photos on the set of the Sk8Kingz documentary. So I toggle silent on while they’re recording.
- Custom Key 2 = Focus Area selection.
- I often switch between Wide, Zone, or Flexible Spot: L
- Custom Key 3 = Shot. Result Preview.
- For checking proper exposure when using flash.
- Custom Key 4 = Toggle touch screen on/off. When using the EVF with touch on, your nose may change the focus point if it touches the LCD.
- Control Wheel = ISO selection.
- AEL Button: Recall Custom Hold 1 for DMF (Direct Manual Focus) access
Setup Guides for Video
- Sony A7 III Best Video Settings by Maarten Heilbron
- Sony A7 III Best Low Light Settings by Make.Art.NowGood intro on dynamic range
- Best quality video with the A7 III is 4K 24fps at 100Mbps
- This custom profile set up is not suitable for daylight or evening hours. It needs to be used in darkest environments for best results to avoid blown out highlights.
- Setting up the Sony a7III for Filmmaking by Gear Glasses & Gadgets
Sony a7 III Tracker at NowInStock.net
Sony a7 III In Stock / Availability Tracker
Tips
General Notes
- The Sony Alpha 7 III, at least in the U.S.A., has a recording limit of about 30 minutes.
- “Native ISO” is the ISO that the camera will produce the highest dynamic range that is advertised with the lowest noise levels. For the Sony A7 III it is ISO 100 and ISO 640.
- Read Noise in DNs versus ISO Setting for Sony ILCE-7M3
- ISO 640 produces less noise and wider dynamic range than ISO 201 to ISO 503.
- Sony a7 III dynamic range and high ISO improve over its predecessor
Shutter Count / Shutter Activations
Sony Alpha Shutter/Image Counter
- This tool provides the number of shutter actuations up to the file in question.
- Electronic/silent/quiet shutter activations are not counted.
- The photo is evaluated on the local computer within the Web browser.
- This tool is based on ExifTool by Phil Harvey.
- Take a new picture and upload it unedited, the image will not be stored.
- Supports Sony, Nikon, Canon, Pentax, Ricoh, etc.
Metadata2Go.com is a free online tool that allows you to access the hidden exif & meta data of your files.
- Shows the shutter_count using a Sony RAW (.arw)
Sony A7 III, how to manually control A, S and ISO?
- After switching the camera to A, S, or P, modes, you can use the front wheel to change the values.
Preventing Overheating
While shooting 4K video, the camera may overheat and shutdown. There are some things you can do to increase the time before the camera overheats.
- Change the automatic temperature overheating shutoff: Set “Auto Pwr OFF Temp.” to “High” (Setup Menu, Page 2of7)
- Pull the LCD panel away from the body.
- The battery is a source of heat. Leaving the battery door open my help the heat from the battery to escape the camera.
- Do not leave your camera in a hot car or unprotected from direct sunlight.
Replacement Parts
Eyepiece Cup
- To minimize the chance of loosing the eyepiece cup, put a piece of Gaffer tape across the top, between the back of the hot shoe and the lip of the eyepiece rubber, to cover the seam where the eyepiece cup connects to the body of the camera.
- If you do need a replacement, here are some choices:
- Sony FDA-EP18 Eyepiece Cup for α cameras (OEM)
- Camera Eyecup JJC Eye Cup Eyepiece Viewfinder (replaces Sony FDA-EP18 eye cup)
- Sony FDA-EP18 Eyepiece Cup BH #SOFDAEP18 • MFR #FDA-EP18
Multi Interface Shoe Cap
- Keep the Multi Interface (MI) hot shoe cap in place to protect the electrical contacts. The pins are thin, so may get damaged easily, and if they get wet there’s a risk of shorting out the camera. Make sure you have at least one spare.
- 2 Pack JJC FA-SHC1M Hot Shoe Cover Cap
- Sony FA-SHC1M Multi Interface Shoe Cap
LCD Screen Repair / Replacement
Shutter Repair / Replacement
- SONY ILCE-7III Tear down and shutter unit replacement by Saiful Anwar
- For Sony A7 III ILCE-7M3 Shutter Group Shutter Unit Repair Parts AFE-3360
Tethered Capture with Sony Cameras
Tethering is a great way to see your photos in real-time during a photo session and/or send images directly from your Sony camera to your computer/tablet/phone. To tether, you’ll need to do the following:
- On your Sony camera go to your USB Connection menu and change the setting from the default of “Auto” to “PC Remote”
- Download and install software to get the Remote (Tether) function.
- Sony Imaging Edge Desktop (free)
- Sony Monitor & Control (free)
- Tether Tools Smart Shooter ($99.99)
- Adobe Lightroom Classic v13.3 or higher
- Capture One
- Connect a USB Tether cable between the Sony camera and your computer. Or tether wirelessly over Bluetooth or Wi-Fi.
- Decide if you want save the photos internally to a memory card, or only send photos to the tethered device, or both. Then configure the camera and software appropriately.
As of May 2024, Adobe Lightroom Classic v13.3 has added native tethered camera support for Sony cameras.
- How to Tether a Sony Camera to Lightroom Classic by Scott Kelby
- Tether Your Sony into Lightroom | Top Tips From Glyn Dewis
- Search: Tether Sony Camera to Lightroom
User Experiences
- Sony Mirrorless Cameras for Music Photography by Adam Elmakias (Music Photography Blog)